Craft Cove Blog

Sunday, September 15, 2013

Lots more crochet

I've been doing a lot of crochet lately, mostly baby stuff.


 There is also a lot of Christmas stuff.


Most of it has been added to my Artfire studio and website.  The rest can be bought by messaging me and will be added to the sites soon.


 Most of the items can also be bought from my stall at the Traralgon craft market every second Saturday of the month.

There are lots of booties,


And high tops


Christmas hats, and nappy covers,


More hats,


Long tail hats,


There are also facewasher gifts and crochet cupcakes.


Sunday, July 7, 2013

Free Crochet Baby Crocs Pattern - Updated

I have improved and updated this pattern. It is still free, but is now written much like a paid pattern. Please consider a donation.  http://craftcove.blogspot.com.au/2015/04/donations.html


I have been asked several times for the pattern to make these baby crocs.

SO HERE THEY ARE!


Want this as a printable pdf? Get it here


This pattern is given for free, but of course I would love it if you would donate something for the time I've put into this for you.

You can do what you want with the finished piece, apart from mass production.  But the pattern itself is mine and cannot be sold or shared without my permission.


BABY CROCS  - my own pattern


Australian/British terms
To fit newborn size

8 ply wool, 4mm hook


Starting with sole

Rnd 1 - Ch 11, 1 htr in 2nd ch from hook, 1 htr in each of next 8 ch, 3 htr in last ch, Now working on other side of chain: 1 htr in each of next 8 ch, 2 htr in last ch, slst to join in 1st htr. (22sts)

Rnd 2 - Ch 2 (counts as a htr) 1 htr in same st as joining, 2 htr in next st, 1 htr in each of next 8 sts, 2 htr in each of next 3 sts, 1 htr in each of next 8 sts, 2 htr in last st, slst to join in top of ch-2. (28sts)

Rnd 3 - Ch 2, 1 htr in same st as joining, 2 htr in each of next 2 sts, 1 htr in each of next 6 sts, 1 tr in each of next 3 stitches, 2 tr in each of next 7 sts, 1 htr in each of next 7 sts, 2 htr in each of last 2 sts, slst to join in top of ch-2. (40sts)


Sides

Rnd 4 - Work this row in the loop behind the back loop, see video here: http://www.mooglyblog.com/third-loop-half-double-crochet/, 1 ch, 1 dc in same st, 1 dc in each of next 14 sts, 1 htr in each of next 15 sts, 1 dc in each of next 10 sts, slst in first dc to join. (40 sts)

Rnd 5 – Working in both loops, 1 ch, 1 dc in same st, 1 dc in each of next 11 sts, 1 tr in each of next 19 sts, 1 dc in each of next 9 sts, slst in first dc to join (40 sts)


Rnd 6 – 1 ch, 1 dc in same st, 1 dc in each of next 13 sts, 2trtog 4x, 1 tr in each of next 2 sts, 2trtog 4x, 1 dc in each of next 8 sts. slst in first dc to join (32 sts)


Rnd 7 – 1 ch, 1 dc in same st, 1 dc in each of next 12 sts, 2htrtog 6x, 1 dc in each of next 7 sts, slst in first dc to join

Rnd 8 - 1 slst across each of next 11 sts, 1 tr in each of next 2 sts, 2trtog 3x across front, 1 tr in each of next 2 sts, slst in each of next 4 sts, slst in first slst to join.

Fasten off.


Work straps separately

Straps (worked separately) – 23 ch, 1 tr in 4th chain from hook, 1 tr in next st, 1 htr in each of next 15 sts, 1 tr in each of last 3 sts. Working over post of tr just made, 1 ch, 3 dc over tr just made, 1 slst in next 19 sts across starting ch, 3 dc over 3 ch at other end, 1 slst in each of next 19 sts along top edge. Slst to join.

Fasten off

Sew buttons in place on foot section


Please consider making a donation  


http://craftcove.blogspot.com.au/2015/04/donations.html


Created by Jenny Lawson


For any questions, email me at: craftcove@gmail.com

More tutorials can be found at: Jewellery from Craft Cove http://craftcove.blogspot.com/
Please do not distribute, lend or copy.
Do not mass produce.


Copyright 2016 Jenny Lawson


There is another size that I still have to fix up the pattern for.


Monday, June 10, 2013

Ear cuff displays

When I first saw ear cuffs, I didn't know what the heck they were.  It took me a while to find out.


Knowing a lot of people probably have the same problem, I decided to make an image of how they're used:


Then I thought a gif would be a great idea, so worked out how to make a gif (which took a while)  and I came up with this:


How to wear an ear cuff photo for-animation-1.gif


I also wrote some instructions and information about them:  http://craftcove.blogspot.com.au/2008/05/free-tutorials.html

But I wasn't totally happy.  I mean how does this look like something you can wear on your ear?


 My husband is better at sculpting than I am so I made up some cold porcelain and he had a go at making some ears.  The only problem is the sizes have to be pretty close to real size to have the cuff fit.  And of course cold porcelain shrinks, supposedly by 30%.  Of course the first try only shrunk a tiny bit.

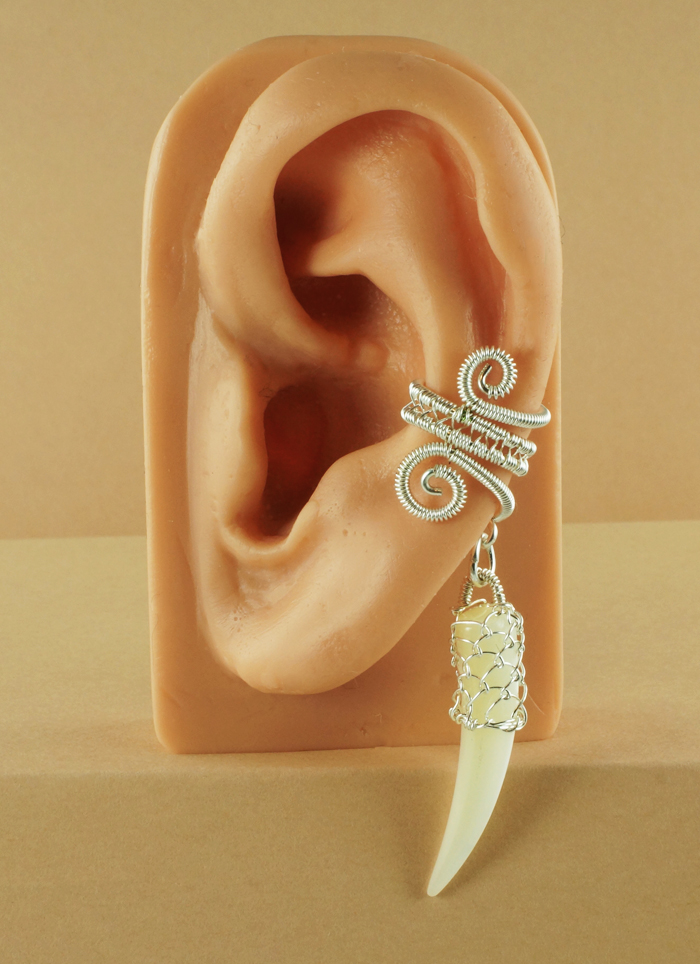
Then one of the most amazing wire work artists posted this:

She asked what people thought of  her new displays.  They were skin colored silicon or plasticy ears!!  What a great idea!!

So of course I asked her where she got them.  But how annoying!  They don't post to Australia!!

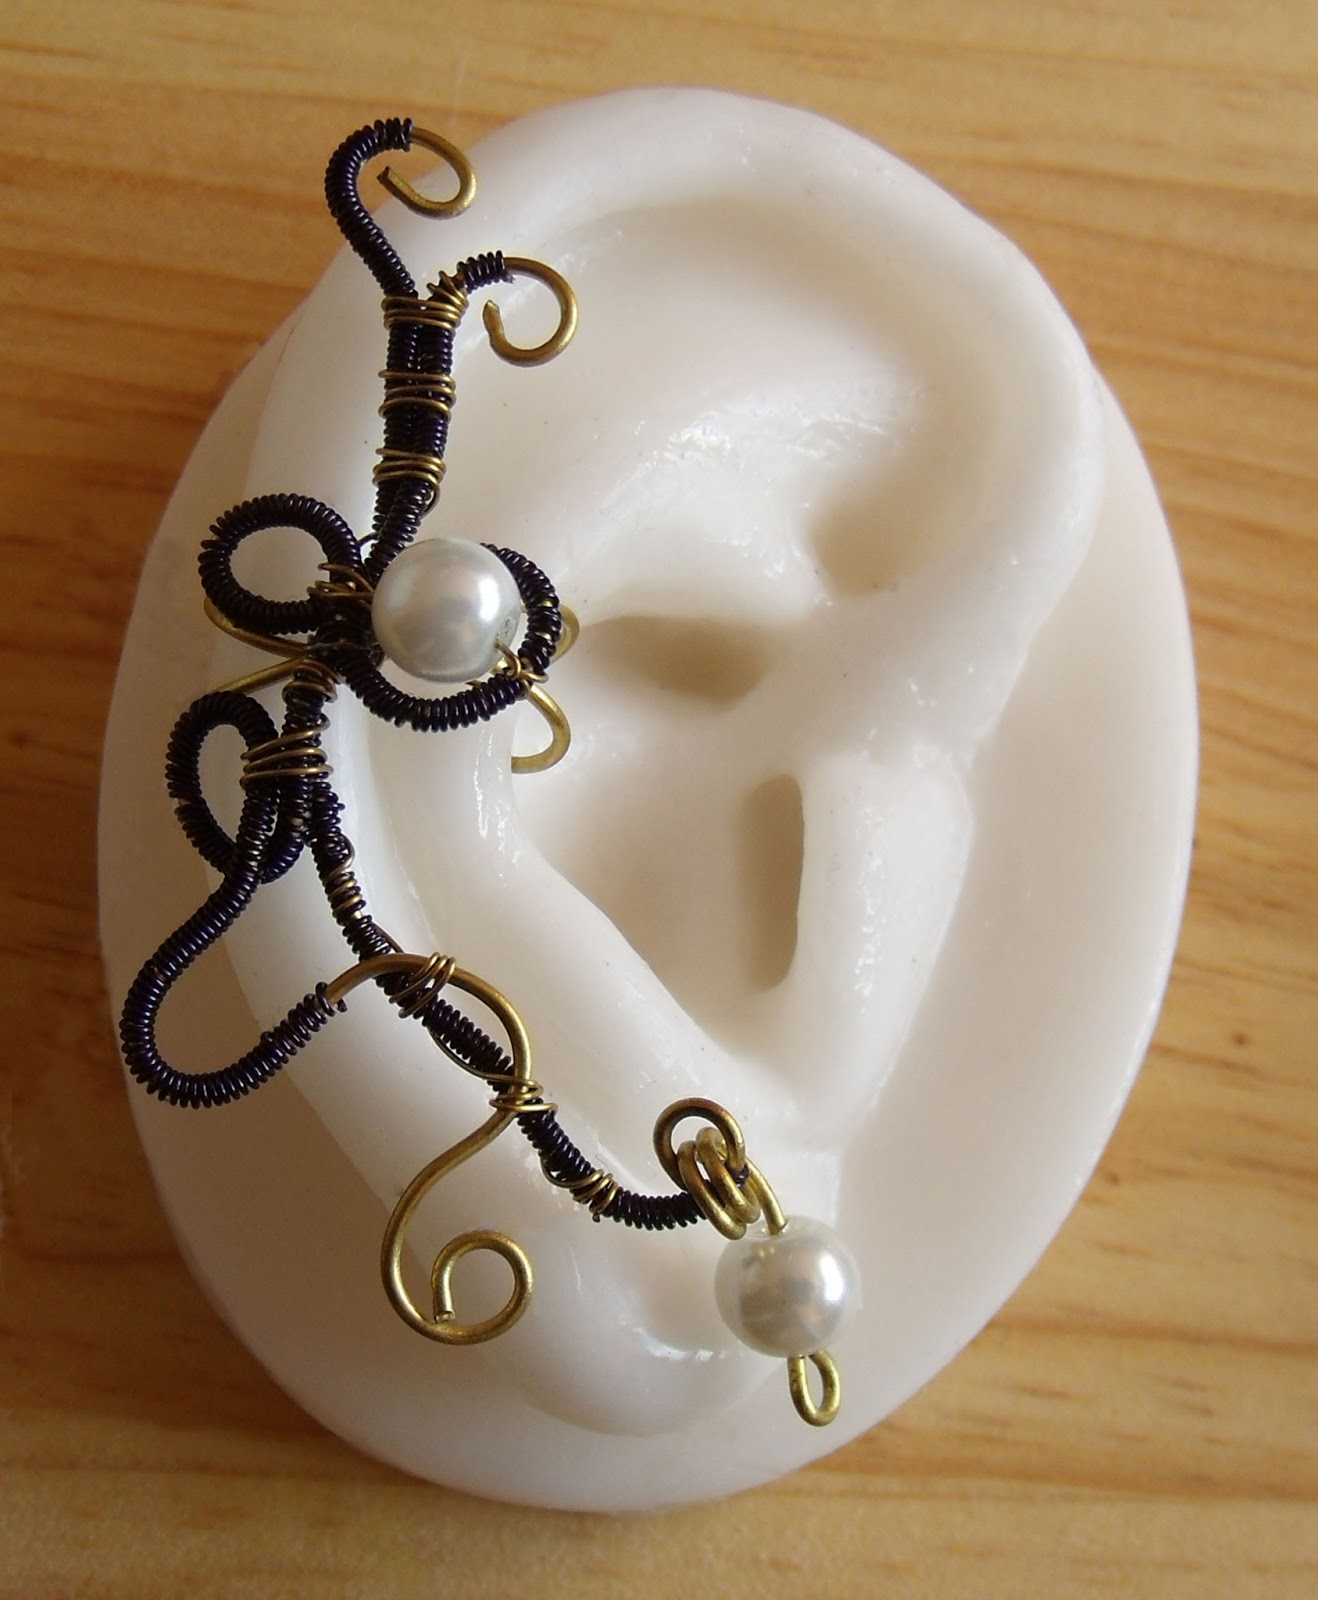
So I looked around at how other people were displaying them.  There were some wonderful black display ears that some people used, others just displayed them on a table, as I did, others used their own ears.  And others used silicon-type ears.

I loved the black stone looking ones.  So I wrote to many different people asking where they got them from.

Damn!  again!  They don't make them any more.  I looked around on Ebay, and it looks like there's a type of silicon ear that's used to practice acupuncture.

Then I finally found a site that makes these ears for acupuncture!  And they post to Australia!  And the price isn't too bad!


And now for the next problem!  I was hoping to hang them by screwing a screw in the top, so that they would stand out at a market stall, and if it was a type with a chain, it would fall naturally.  But when I received it, I soon realized that wasn't going to be possible with this silicon, it would just break and fall out.

I played around with ways of framing it.  But to no avail.

Finally I made a stand!


And I'm pretty happy with it all!


Tuesday, April 30, 2013

Now on Artfire

I've decided to re-open my Artfire shop.

I'll be listing a large variety of things there.  Including beaded flowers: 


chainmail: 


3d charms: 


beadweaving: 


And much more

You can find them at: Craft Cove at Artfire

I also have the Artfire kiosk on my facebook page


With this app, you can buy directly from my facebook page without even leaving facebook, you can shop for items and checkout through ArtFire.com.  No account is needed  and you get an Encrypted Secure Checkout.

There is also a rapid cart option at the top of this blog, which works in much the same way.

There is currently a 15% discount on everything as I list them, until further notice.

Saturday, March 23, 2013

More craft Markets

There will be a special craft market at Wonthaggi on Easter Sunday.

I decided I will have a stall there again.

The following month, on Sunday 14th April I will have a stall at Traralgon.

Hope to see many of you at these markets.


Add this

| More